
By Automotive Research TeamUpdated 2026-09-25
How to Remove a Tint From a Car Window
how to remove a tint from a car window starts with one sorting question: is the darkness a peelable film, or is it dyed into the glass at the factory? Aftermarket film sits on the interior surface and comes off with heat, patience, and careful scraping. Factory privacy glass does not. Chemical Guys states that only aftermarket film can be physically removed; Family Handyman says the same about embedded dye. If you pull hard on glass that was never filmed, you waste an afternoon and risk scratching the only glass you have.
Once you confirm film, the shared advice from detailing and DIY pages is the floor: soften the adhesive with heat or steam, peel slowly at a low angle, protect the cabin from runoff, keep metal blades off the rear defroster grid, and clean the glue that stays behind. This page starts there, then answers the follow-ups those guides leave open—how to tell film from factory glass in sixty seconds, what changes when the film tears into the door channel, when shredding means you should stop, how to finish the rear window without killing the defroster, and what to do after the glass is bare. Nothing here replaces a shop quote if the film is baked on for a decade and every peel turns to confetti.
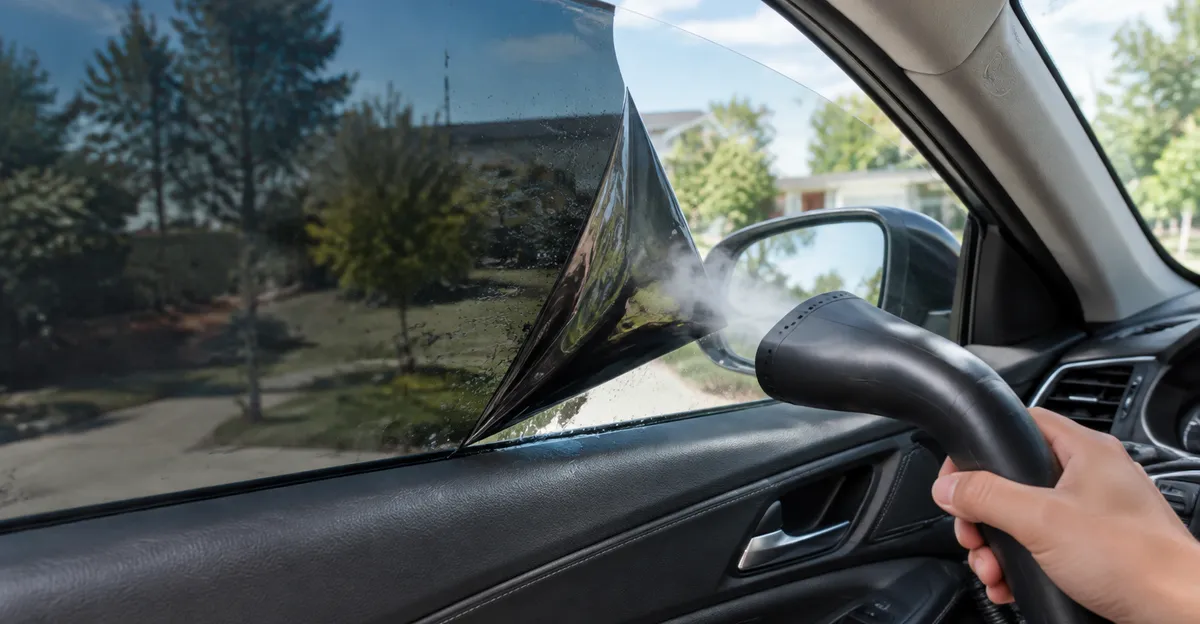
Film Versus Factory Privacy Glass
Before you buy a steamer, prove the tint is a sheet. Park in shade. Wipe the inside glass. Shine a flashlight across a top corner at a low angle. Family Handyman uses that flashlight trick on fixed quarter glass where the black ceramic freckle band hides the film edge. Look for a thin edge that lifts under a fingernail or a plastic card. Look for bubbles, purple fade, or a peeled corner that already collects dust. Those signs point to aftermarket film.
Factory privacy glass usually looks evenly dark from every angle, with no peelable corner and no adhesive haze when you rub a fingernail across the surface. Chemical Guys notes that factory tint is baked into the glass itself. Family Handyman’s FAQ is blunt: you cannot remove tint that is embedded. If the sales sticker or window etching mentions privacy glass and you cannot find a film edge, treat the darkness as permanent. You can still clean the glass. You cannot strip it clear.
| What you see | Likely type | First move |
|---|---|---|
| Lifted corner, bubbles, purple cast | Aftermarket film | Heat and peel |
| Even darkness, no edge under light | Factory privacy glass | Stop; do not scrape for “tint” |
| Film only on rear and rear doors | Common aftermarket package | Remove film pane by pane |
| Dark glass plus a second wrinkled layer | Film over privacy glass | Remove only the film layer |
That table is the sorting tool. The rest of this guide assumes you found a peelable film.
how to remove tint from car windows is often a visibility and legality decision, not a weekend hobby. Chemical Guys describes dye-based films that purple under UV, bubble as layers separate, and peel at the edges as adhesive loses elasticity. Delaminated film scatters light at night. Bubbles collect moisture and dirt. A peeling flap at the top of a door window catches every time the glass goes up and down.
States set their own visible-light transmittance limits on side and rear glass. Chemical Guys notes that film that was tolerated when installed can fall outside current rules, and that a used car may already carry noncompliant film. Rules vary by state. A fix-it ticket usually means remove or replace the film until the glass meets the limit for that location—not invent a nationwide VLT number from a blog. If an officer cited a specific percentage, verify it with your state highway patrol or DMV materials before you argue the ticket.
Peeling film can also foul the door seals and the window channel. Fragments that drop into the felt run can squeak, bind, or leave black streaks on clear glass later. Clearing failed film is maintenance as much as appearance.
Tools and Prep That Actually Matter
Chemical Guys ranks a handheld garment steamer above a heat gun for DIY work because moist heat softens adhesive more evenly and with fewer hot spots. A heat gun still works if you keep it moving about six inches from the glass. Family Handyman’s project uses a heat gun plus a razor scraper, soapy cleaner, and a non-scratch pad. CarParts.com’s removal guide lists ammonia, black plastic bags, microfiber cloths, gloves, and a mask for the soak method. Engineer Fix adds plastic sheeting for the rear deck, speakers, and carpet because steam and solvents drip.
Gather before you start:
- Garment steamer, or a heat gun or hair dryer on a low setting
- Fresh single-edge razor blades in a holder for clear side glass only
- Plastic scrapers or plastic razors for anything near a defroster grid
- Spray bottle with soapy water or glass cleaner
- Rubbing alcohol or a citrus adhesive remover
- Microfiber towels (one for glue, one for the final wipe)
- Plastic sheeting or towels for the door card, sill, and rear package shelf
- Safety glasses and gloves; a respirator or strong ventilation if you use ammonia
Park in shade. Chemical Guys warns that direct sun makes adhesive behave unpredictably and evaporates lubricants before they help. Cover electronics and fabric. Open doors or windows for airflow. Keep kids and pets out of the cabin while ammonia or strong solvents are open—fumes concentrate fast in a closed garage.
Side Windows: Heat, Peel, and the Door Seam
Family Handyman’s roll-down sequence is the practical map for a typical door window. Roll the glass down about a third so the top edge of the film is exposed. Warm a small area at the top with the heat gun or steamer until the film softens. Lift with a fingernail, plastic card, or the flat of a fresh blade. Work across the top to a corner, then peel diagonally so the sheet stays in one piece. Keep heat moving ahead of the peel. When you reach the lower travel limit, roll the glass fully up and continue down. At the bottom, pull the film out of the window seam corner by corner rather than yanking straight up.
That seam step is where DIY jobs fail quietly. If you rip the film and a long strip disappears into the channel, stop pulling. Roll the glass slowly while watching the gap. Soften the remaining edge with more steam. Work the scrap out with plastic tweezers or a plastic card—not a long metal blade shoved into the felt. Forcing metal into the run risks cutting the regulator cable, scratching the hidden glass edge, or packing adhesive into the seal. If a scrap will not come free after several careful cycles, leave it and schedule a shop that can drop the door panel rather than destroy the regulator for one strip of film.
Fixed quarter glass follows the same heat-and-peel idea without the channel. Family Handyman notes the ceramic freckle band along the edge and warns not to scrape that coating off while chasing glue. Use a flashlight to find the film edge, lift a corner (pliers help if the edge is tiny), and peel diagonally. Clean with spray, a low-angle blade, a non-scratch pad, and a squeegee.
Rear Glass, Heat Alternatives, and the Defroster
The rear window under the roof line is a different job because the defroster grid sits on the glass. Engineer Fix describes those lines as thin conductive filaments bonded to the surface. Metal scraping across them can open the circuit. CarParts.com warns that a razor will ruin the rear defrost unless you are extremely careful between lines, and recommends fabric steamer or ammonia methods with great care instead. Engineer Fix’s rule is simple: steam to soften, peel slowly at a low angle, and never use abrasive pads or metal razors across the main film or the residue on the grid.
Protect the package shelf and speakers first. Hold the steamer a few inches from the film and warm the area where you are about to peel. Keep steam on the release line so adhesive prefers the film over the glass and the filaments. If the sheet tears, stop, re-steam the new edge, and start again. After the bulk is off, dab rubbing alcohol, mineral spirits, or a commercial adhesive remover onto the residue, wait a few minutes, and wipe gently. Engineer Fix allows a plastic scraper or a soft white non-abrasive pad with light pressure parallel to the lines—not across them like a scrub brush.
When the glass is clean, wipe with an ammonia-free glass cleaner. Chemical Guys prefers ammonia-free formulas around defroster elements and rubber trim for the final pass. Then start the car, turn on the rear defroster, wait a few minutes, and feel along the lines for heat. A cold section after a warm-up points to a break. That break is expensive to repair compared with the cost of patience during removal. If the rear film is ancient, brittle, and shreds on the first pull, paying a tint shop that removes film daily is often cheaper than a rear-glass or defroster repair.
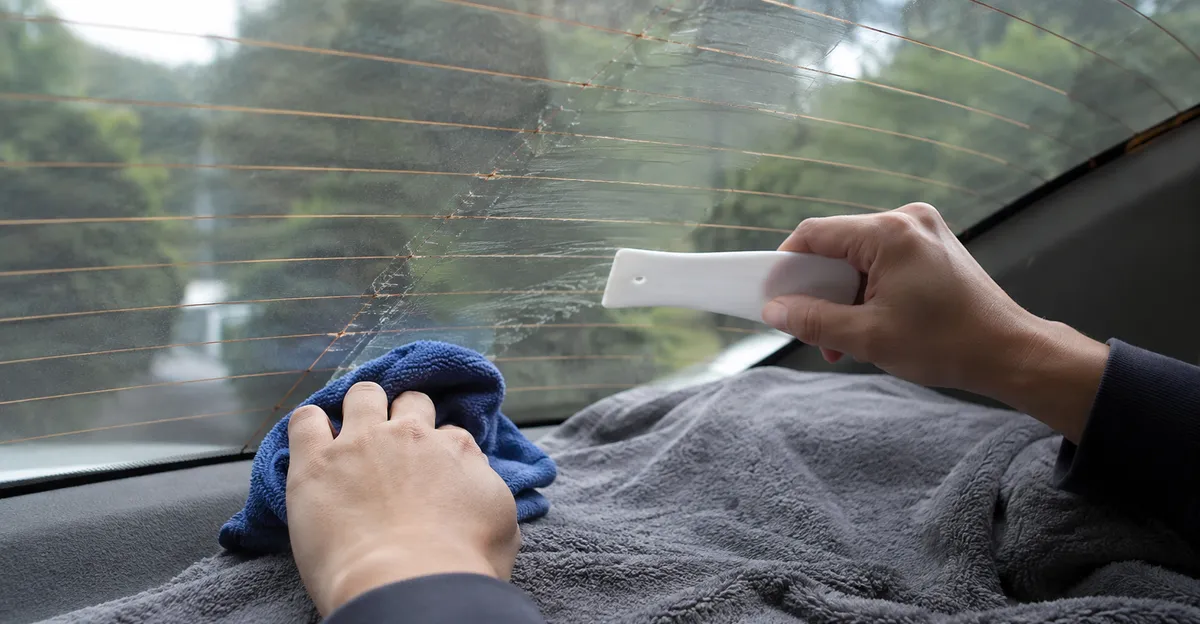
Not every driveway has a steamer. CarParts.com describes an ammonia-and-bag soak: protect the interior, spray household-strength ammonia on the film, cover with a black plastic bag, and park in sun so heat and fumes soften the adhesive for roughly twenty minutes or more. Wear a mask, gloves, and goggles. Ventilate. Ammonia fumes are harsh; do not leave the bottle open in a closed garage with people or pets nearby.
Chemical Guys lists a slower no-heat option: wet the film, cover with plastic wrap for about thirty minutes, then attempt a peel. It is less reliable than direct heat. A hair dryer on low is the lightest heat tool—slower than a steamer, safer than a heat gun held too close. Whatever the heat source, the peel rules stay the same: shallow angle, continuous softening ahead of the edge, stop and reheat when the film fights you.
Adhesive Cleanup and Common Mistakes
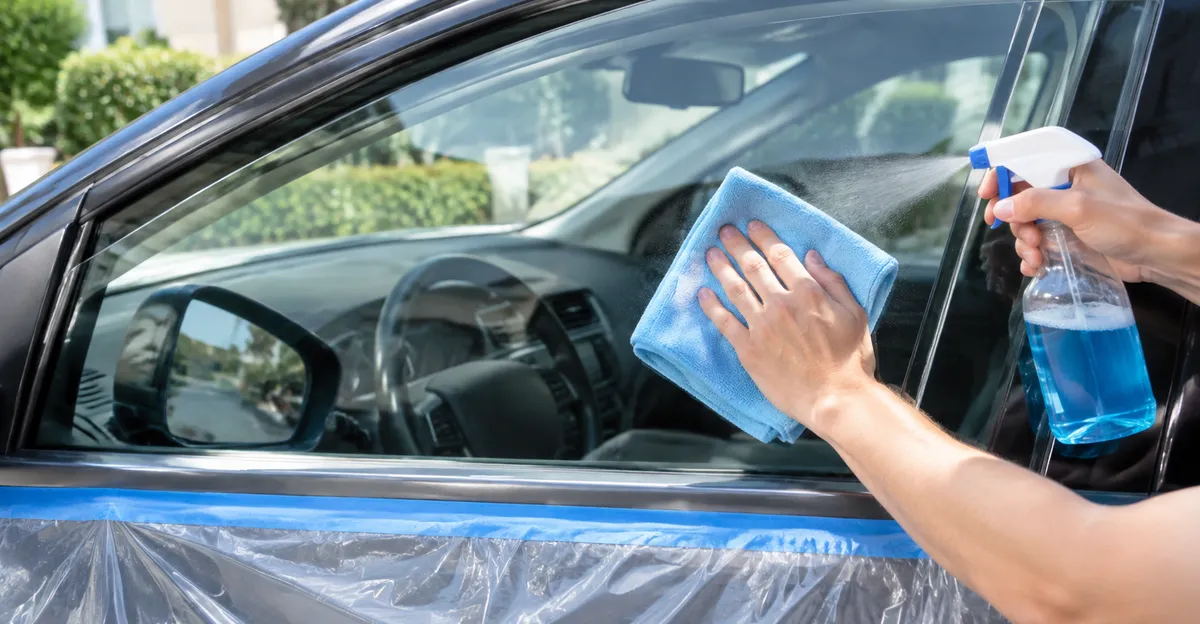
Even a clean peel leaves glue. Family Handyman sprays cleaner, scrapes with a razor, follows with rubbing alcohol on sticky spots, then a non-scratch pad and a squeegee. Roll the window down again to clean the top edge that lived under the frame, and flush the bottom seam so grit does not stay in the run. Chemical Guys mists a lubricant over residue, holds the razor nearly flat, pushes in short strokes only (no back-and-forth digging), and wipes the blade often so loaded goo does not redeposit.
On the rear glass, replace the metal razor step with solvent and plastic tools as Engineer Fix describes. Wipe final cleaner in the direction of the defroster lines. Inspect with a flashlight at a low angle—Chemical Guys recommends raking light to reveal fine scratches before you decide the glass is ready for new film or a ceramic coating. Light haze from adhesive oil should wipe away. Deep scratches need a glass shop opinion before you pay for a fresh tint install.
If you plan to retint, leave the glass fully clean and dry. Shops reject glass that still feels tacky. If you plan to leave the glass clear, expect more cabin heat and glare than you had with film; that is the trade for legality or visibility, not a defect in the removal.
Skip dry peeling. Chemical Guys says cold adhesive shreds film into fragments and turns one peel into dozens of pick-and-scrape patches. Skip steep razor angles and dry blades on clear side glass. Family Handyman’s scratch answer is that a clean stainless blade kept wet and held low against the glass is safe; a dull, nicked, or dry blade is what marks the glass. Dumping ammonia runoff onto speakers or the trunk-adjacent package shelf soaks foam and wiring. Yanking film out of a door seam without rolling the glass can tear a long strip into the channel where you cannot reach it. Crossing rear defroster lines with metal opens the circuit. Protect the cabin the way Engineer Fix describes, keep blades fresh on side glass only, and keep metal away from the rear grid entirely.
When to Stop DIY and Call a Shop
Stop when the film delaminates into a dyed skin that stays on the glass while the clear carrier peels off. That pattern means the adhesive and dye layers are cooked. More heat may help, but aggressive scraping on a rear grid is how defrosters die. Stop when scraps are trapped deep in a door channel and the regulator already feels rough. Stop when you see a cold defroster line mid-job and you have been using metal near the grid. Stop when factory privacy glass was misidentified as film.
A tint shop that removes film regularly has steamers, scrapers, and solvent habits built for volume. Compare that labor cost to a rear defroster repair or a scratched laminated windshield mistake. Windshields on modern cars are laminated safety glass; side windows are usually tempered. Do not treat a windshield film job the same as a door window if cameras, rain sensors, or heating elements sit in the glass—those installations belong to a glass or tint professional.
After the Film Is Gone
Test every power window through a full up-and-down cycle. Listen for new squeaks that mean scrap film is still in the run. Test the rear defroster as Engineer Fix describes. Wipe door cards and sills so solvent does not stain vinyl. If you removed film to satisfy a ticket, keep the citation and a dated photo of the clear glass until the case is closed—state procedures differ, and this site does not give legal advice for your county.
Expect the cabin to run warmer without heat-rejecting film. Expect more glare at sunrise and sunset, including reflections from oncoming lights. If night driving was the reason you removed purple, delaminated film, clear glass should improve contrast immediately once adhesive haze is gone. If you still struggle with fog on cool mornings, that is a climate and moisture problem, not a leftover tint problem—see how to stop car from fogging up after you finish this job.
Retinting is optional. If you install new film, use a shop that understands your state’s VLT limits for each window position. Front side glass limits are often stricter than rear glass. Factory windshield film rules are stricter still. Do not guess percentages from memory after a ticket; verify the current state chart.
FAQ
how to remove window tint from car windows
Family Handyman softens the adhesive with heat, peels slowly from the top edge after rolling a side window down about a third, then scrapes leftover glue with a wet razor and cleaner. Chemical Guys prefers a garment steamer held about six inches from the glass so the adhesive releases evenly. On a rear window with a defroster grid, Engineer Fix says use steam and plastic tools only—never scrape metal across the lines.
how to remove window tint from car
Treat every pane as its own job: roll-down doors, fixed quarter glass, and the rear glass with defroster lines. Soften the adhesive with steam or low heat, peel at a shallow angle, then dissolve residue with rubbing alcohol or a commercial adhesive remover. Chemical Guys notes that factory privacy glass is dyed into the glass and cannot be peeled off—only aftermarket film can.
will a razor blade ruin the rear defroster
Yes, if you scrape across the grid. Engineer Fix explains that the conductive filaments sit on the glass surface and a metal blade can sever them, killing the circuit. Use steam, peel slowly, and dab residue with solvent and a plastic scraper or soft pad wiped parallel to the lines. Test the defroster after cleaning by feeling for heat across the grid.
can you remove tint from factory-tinted glass
No. Family Handyman and Chemical Guys both state that factory tint is dye or pigment baked into the glass, not a removable film. If the glass looks evenly dark with no peelable edge under a flashlight, stop. You can add or remove aftermarket film on clear glass, but you cannot strip factory privacy glass back to clear.